
티스토리 뷰

설치환경
서버:Ubuntu 20.04 LTS
커널: 5.13
1. ctags + cscope 설치
apt-get install ctags -y
apt-get install cscope -y

2. vim + plugin 설치
git clone을 하기 위해 git도 함께 설치합니다. 미리 설치되있으면 생략해도 됩니다.
sudo apt-get install vim -y
sudo apt-get install git -y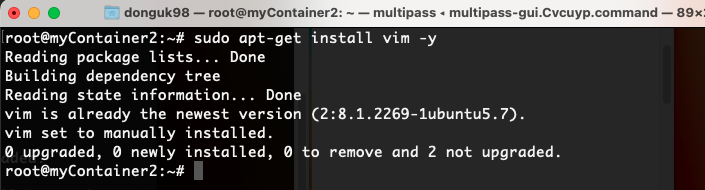

3. 디렉토리 생성 및 git clone
mkdir ~/.vim
mkdir ~/.vim/bundle

git clone https://github.com/VundleVim/Vundle.vim.git ~/.vim/bundle/Vundle.vim
4. .vimrc 파일 생성
vim 환경설정을 하는 .vimrc파일을 생성합니다. vim에서 들여쓰기, 행 확인 등과 같은 설정을 할 수 있습니다.
아래 설정 내용하나로 cscope, ctags등과 관련된 속성들과 자동화하는 shell code을 정의할 수 있습니다
작성 후 :wq로 빠져나옵니다.
vi ~/.vimrcset nu
set autoindent
set cindent
set smartindent
set textwidth=79
set wrap
set nowrapscan
set visualbell
set ruler
set tabstop=4
set shiftwidth=4
set fencs=ucs-bom,utf-8,euc-kr.latin1
set fileencoding=euc-kr
"set background=dark
set ignorecase
set hlsearch
"mouse scroll enable
set mouse=a
"파일빨리 열어보는 map 관련
map ,1 :b!1<CR>
map ,2 :b!2<CR>
map ,3 :b!3<CR>
map ,4 :b!4<CR>
map ,5 :b!5<CR>
map ,6 :b!6<CR>
map ,7 :b!7<CR>
map ,8 :b!8<CR>
map ,9 :b!9<CR>
map ,0 :b!0<CR>
map ,w :bw<CR>
"colorscheme evening
syntax on
"ctags file 옵션 들이다.
"set tags=/root/Android_NexusOne_Source_2.3.3/tags
"cscope 옵션 들이다.
set csprg=/usr/bin/cscope
set csto=0
set cst
set nocsverb
if filereadable("./cscope.out")
cs add cscope.out
else
cs add /usr/src/linux/cscope.out
endif
set csverb
"ctags cscope macro setting
if version >= 500
func! Sts()
let st = expand("<cword>")
exe "sts ".st
endfunc
nmap ,st :call Sts()<cr>
func! Tj()
let tj = expand("<cword>")
exe "tj ".tj
endfunc
nmap ,tj :call Tj()<cr>
endif
func! Css()
let css = expand("<cword>")
new
exe "cs find s ".css
if getline(1) == ""
exe "q!"
endif
endfunc
nmap ,css :call Css()<cr>
func! Csc()
let csc = expand("<cword>")
new
exe "cs find c ".csc
if getline(1) == ""
exe "q!"
endif
endfunc
nmap ,csc :call Csc()<cr>
func! Csd()
let csd = expand("<cword>")
new
exe "cs find d ".csd
if getline(1) == ""
exe "q!"
endif
endfunc
nmap ,csd :call Csd()<cr>
func! Csg()
let csg = expand("<cword>")
new
exe "cs find g ".csg
if getline(1) == ""
exe "q!"
endif
endfunc
nmap ,csg :call Csg()<cr>
"Tag list환경 설정 ===========================================
"F2를 눌렀을 때 symbol window를 나오게 하는 Renaming Instruction
filetype on
nmap <F2> :TlistToggle<CR>
let Tlist_Ctags_Cmd = "/usr/bin/ctags"
let Tlist_Inc_Winwidth = 0
let Tlist_Exit_onlyWindow = 0
let Tlist_Auto_Open = 0
let Tlist_Use_Right_Window = 1
"===================
"Source Explorer
"========================
nmap <F3> :SrcExplToggle<CR>
nmap <C-H> <C-W>h
nmap <C-J> <C-W>j
nmap <C-K> <C-W>k
nmap <C-L> <C-W>l
let g:SrcExpl_winHeight = 8
let g:SrcExpl_refreshTime = 100
let g:SrcExpl_jumpKey = "<ENTER>"
let g:SrcExpl_gobackKey = "<SPACE>"
let g:SrcExpl_isUpdateTags = 0
"==========================
"NERD Tree
"============================
let NERDTreeWinPos = "left"
nmap <F4> :NERDTreeToggle<CR>
"폴딩
"nmap <F3> v]}zf
"폴딩 해제
"nmap <F4> zo
"cscope option 들이다.
"커서가 위치한 변수(함수)의 정의를 보고 싶은 경우,
nmap <F5> :cs find g <C-R>=expand("<cword>") <CR><CR>
"커서가 위치한 함수가 호출된 모든 경우를 보고 싶은 경우
nmap <F6> :cs find c <C-R>=expand("<cword>") <CR><CR>
"커서가 위치한 변수(함수)의 모든 사용례를 보고싶은 경우
nmap <F7> :cs find s <C-R>=expand("<cword>") <CR><CR>
set rtp+=~/.vim/bundle/Vundle.vim
call vundle#begin()
Plugin 'gmarik/Vundle.vim'
Plugin 'The-NERD-Tree'
Plugin 'Source-Explorer-srcexpl.vim'
Plugin 'SrcExpl'
Plugin 'taglist.vim'
Plugin 'AutoComplPop'
Plugin 'snipMate'
Plugin 'vim-airline/vim-airline'
Plugin 'vim-airline/vim-airline-themes'
call vundle#end()
"========== AutoCompletePop ==========
function! InsertTabWrapper()
let col=col('.')-1
if !col||getline('.')[col-1]!~'\k'
return "\<TAB>"
else
if pumvisible()
return "\<C-N>"
else
return "\<C-N>\<C-P>"
end
endif
endfunction
inoremap <TAB> <c-r>=InsertTabWrapper()<cr>
hi Pmenu ctermbg=blue
hi PmenuSel ctermbg=yellow ctermbg=black
hi PmenuSbar ctermbg=blue5. plugin 설치
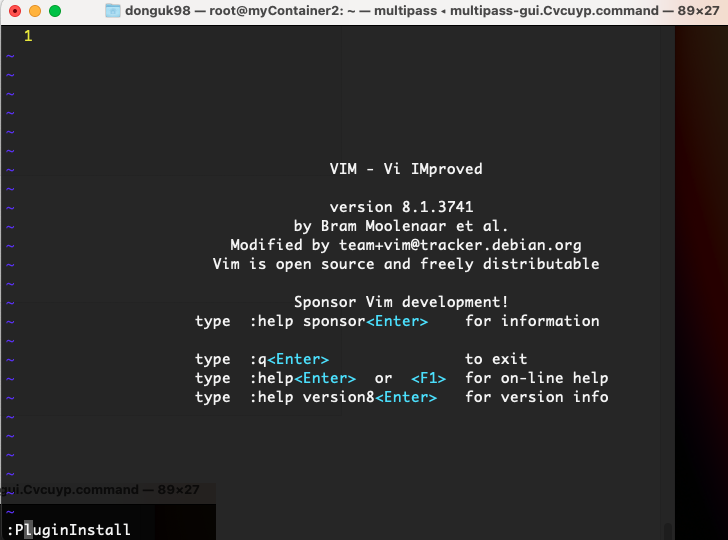
터미널에서 vim을 입력한 후 :PluginInstall를 입력하면 모든 Plugin 설치 완료
vim

:PluginInstall
vim을 입력하면 아래와 같은 화면이 나옵니다.

:PluginInstall을 입력하고 엔터를 누릅니다.
엔터를 누르고 나면, 앞쪽 + 표시와 함께 설치가 정상적으로 완료되면 Done!이라는 문구가 출력됩니다.

6. 원하는 파일 목록 생성 및 cscope.out 생성
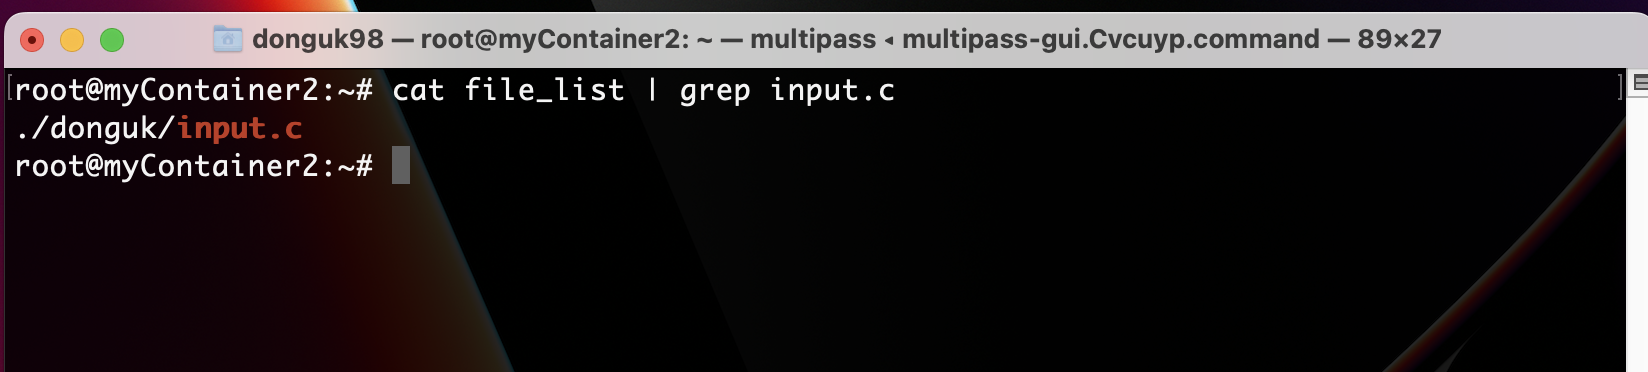
아래의 find 명령어를 이용해 c, C, h, H 등 찾고싶은 파일 확장자를 입력합니다. 확장자가 아니더라고 find가 제공하는 조건에 따라 찾을 수 있습니다. file_list라는 이름으로 파일이 생성된 것을 볼 수 있습니다.
find ./ -name '*.[cCsShH]' > file_list
~/donguk 디렉토리에 input.c라는 파일을 생성하였고, 짧은 파일 입출력 코드를 담고 있습니다. 파일은 find 명령어 이전에 생성된 파일이므로, find 명령어를 입력하였을 때 file_list에 이미 추가되어있는 상태입니다.

cscope -i file_listcscope -i file_list 명령어를 입력하면 아래와 같은 화면이 보입니다.
cscope.out 파일이 생성되는 과정이고 command + d를 눌러 빠져나옵니다.

7. cscope 사용하기
vim cscope.out
:cscope add cscope.out
방금 생성된 cscope.out 파일을 Vim 으로 열고 :cscope add cscope.out을 입력하면 cscope를 사용할 수 있습니다.
하지만 매번 :cscope add cscope.out 를 입력하는 것은 번거로운 일 이기에 아래 shell 명령어를 vimrc 파일에 추가해주면 자동으로 cscope.out 파일이 적용됩니다.
if filereadable("./cscope.out")
    cs add cscope.out
endif
이후 cs find를 이용하여 cscope를 사용할 수 있습니다.
:cs find <option> <name>| s | C 심볼을 검색 |
| g | 전역 선언을 검색 |
| d | 함수에 의해 호출되는 함수들을 검색 |
| c | 함수를 호출하는 함수들을 검색 |
| t | 텍스트 문자열을 검색 |
| e | 확장 정규식을 사용하여 검색 |
| f | 파일 이름을 검색 |
| i | 파일을 인클루드 하는 파일을 검사 |
:cs find g main 을 입력하여, input.c의 main 함수를 확인할 수 있습니다 !

'Linux' 카테고리의 다른 글
| [Linux] 커널 디버깅 하는 방법 / printk, ftrace(trace_printk) (4) | 2022.10.13 |
|---|---|
| [Linux] 리눅스 커스텀 커널 설치하는 법 (0) | 2022.10.06 |
| [Linux] 우분투 서버에서 리눅스 컨테이너(LXC) 생성하기 (0) | 2022.04.30 |
| [Linux] ZNS(Zone NamedSpace)의 개념과 ZNS SSD (0) | 2022.04.30 |
| [Linux] 리눅스 컨테이너(LXC)에 대해서 알아보자 (0) | 2022.04.13 |
- Total
- Today
- Yesterday
- 스프링 프레임워크
- 2차 데모데이
- java
- 런칭 페스티벌
- 8주차 회고
- ZNS
- ZNS SSD
- 알림개선기
- 우테코 회고
- 프로젝트
- 3차 데모데이
- 파이썬
- 피움 6주차 회고
- 5주차 회고
- 피움
- CI/CD
- 네트워크
- 스프링 부트
- 스프링 Logback
- dm-zoned
- 알림기능개선기
- 백준
- dm-zoned 코드분석
- 스프링MVC
- 팀프로젝트
- 환경 별 로깅 전략 분리
- 회고
- Spring
- jpa
- 우테코
| 일 | 월 | 화 | 수 | 목 | 금 | 토 |
|---|---|---|---|---|---|---|
| 1 | 2 | 3 | 4 | 5 | 6 | |
| 7 | 8 | 9 | 10 | 11 | 12 | 13 |
| 14 | 15 | 16 | 17 | 18 | 19 | 20 |
| 21 | 22 | 23 | 24 | 25 | 26 | 27 |
| 28 | 29 | 30 |